- Red and blue decor would fit the theme perfectly.
- Webs and spiders could substitute licensed products to cut costs.
- This was gonna be a LOT of fun!
Next, I got started on the cake table backdrop. I found some really cute sky lines and city scapes on Pinterest that I decided to take a stab at. So from a $2 foam board, a few different sized and shaped boxes I found around the house (cereal boxes, food packages, etc), a few sheets of tissue paper and some colored card stock I created this.

I just used a sharp knife to cut the foam board and placed pieces of yellow card stock strategically to create windows. I then wrapped the boxes in tissue paper and placed black card stock shapes for the windows and voila!
Now you're wondering, "What about those little spiders!?" Those my friend consist of lollipops, pipe cleaners, yet again red tissue paper and oggly googly eyes. I cut the tissue paper into squares and wrapped the top of the lollipop. I then cut the pipe cleaners in half and used 4 of the pieces to create the spider legs. I did this by wrapping them tightly around the area where I'd twisted the tissue paper then bending them to look spider leg-like. Finally, a dot of hot glue to affix the eyes and we've got arachnids!
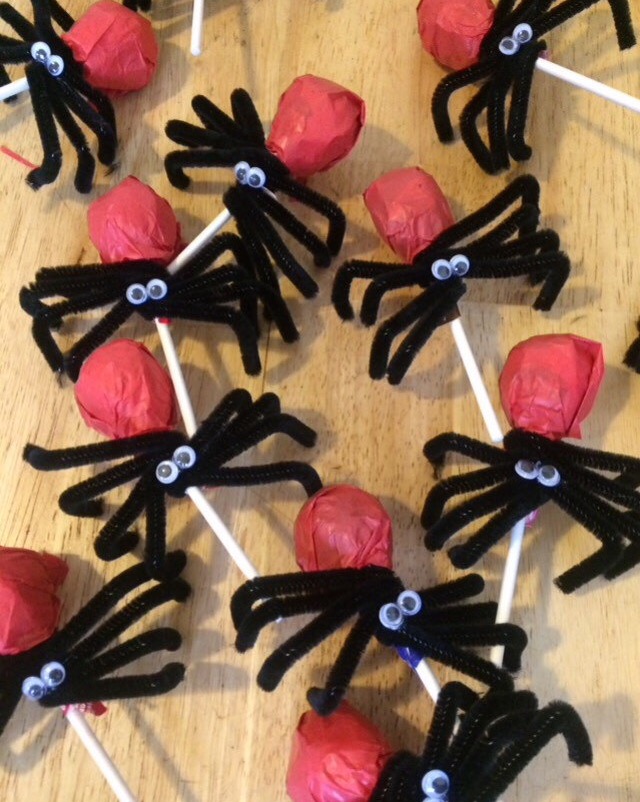
Here's a pic of the spidey pops without the tissue paper wrapping. It's really up to you.

These little guys doubled as decor and favors. Gotta love a 2-fer!! Additionally, I wrapped some cookie packs in colored card stock to resemble candy bars. On each I drew a number 4 for my big guy and surrounded if with Spidey's signature webs. Adorbs if I do say so myself! For those not so artistically inclined, Google a nice free printable to use.
I know, I know, the next question is probably "What good are favors without treat bags?" Well, here you go! You'll need to get some solid colored red paper bags, a fine point black Sharpie, some white cardstock and a ruler. I started with a large plus sign, followed by an X. From there I started in the middle drawing curved lines connecting to the straight lines and worked my way out to the edges. Finally, I drew large ovals in the white cardstock and cut them diagonally to create the eyes. Some of mine were off shape so I took the Sharpie and traced around the edges of the eyes.


Stuff with some great favors and a little blue tissue paper and the party is on!!
I almost forgot the spidey masks! We opted out of party hats for a Spider-man mask to add to the effect for our theme superhero theme. For these I used felt sheets that I purchased from Michael's, a Sharpie and yarn. I actually did purchase elastic cording but instead of guesstimating the sizes of the children's heads, I went with yarn that could be tied to fit. With the felt positioned in the portrait position, I folded the top corner down to the bottom, cut in half and then repeated this step on the now half sheets of felt. I then just rounded off each corner with scissors, folded it in half (side to side fold) and cut about an inch long triangle for the nose (of course, rounding off points). I eyeballed where to cut out eyeholes and on either side cut a small slit where I tied a piece of yarn. That's it!

Here's my nephew looking very pleased in his mask. Right behind him you'll find my little assistant also known as my super helpful daughter Brynn and my Fiancé in a not so successful photo bomb attempt!
Therefore, my total to make this party look spidey-tastic took all of about 3 days of my sons midday nap time (2-3 hrs depending on his mood) and approximately $25!
No comments:
Post a Comment